How to use Radial Line Mapping Tool
Get data on properties and people along a straight line or alignment.
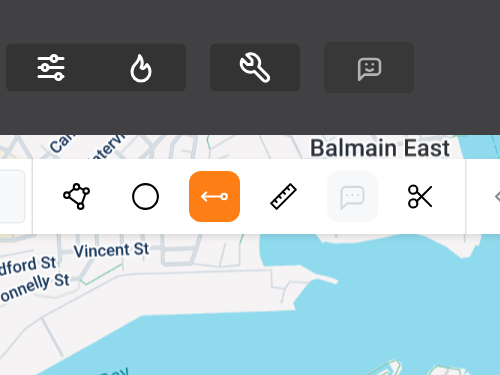
1. Select The Radial Line Tool
The Radial Line Tool is located at the top of the map (highlighted orange in this
image).
image).

2. Start defining the alignment
Left click the mouse to create the starting point of your map. Then move the mouse to your desired end point and left click again.

3. Optional: extend the alignment
You can keep extending the alignment for as long as you require by adding
additional lines.
additional lines.
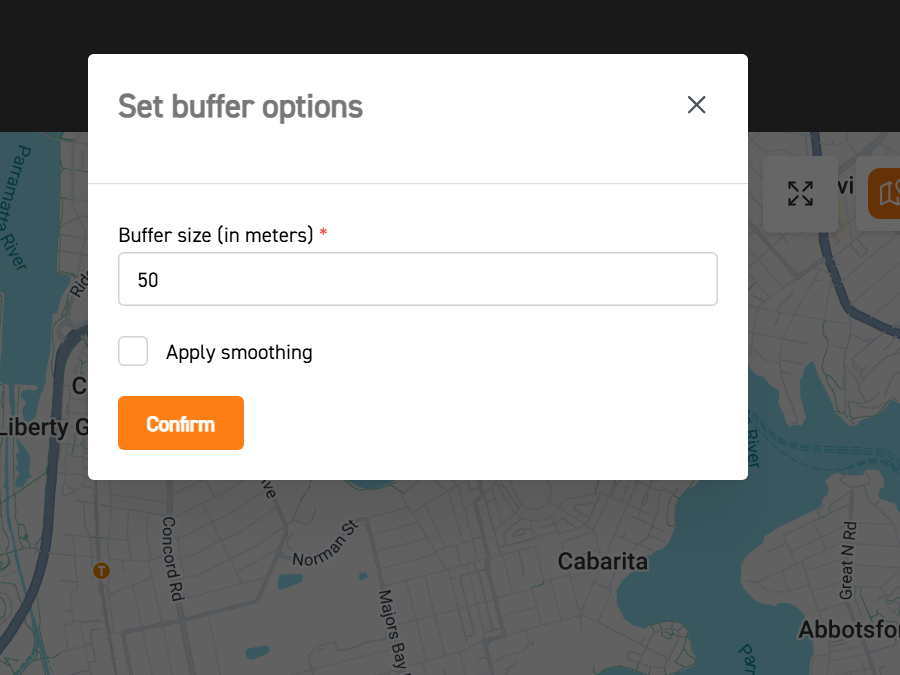
4. Define your buffer zone
Once you’re happy with the alignment, left click again. Choose the buffer size to specify the area you want to capture either side of your alignment e.g. 50m, 100m, 200m etc. To straighten your line, select “Apply smoothing”.

5. Complete your map
To finalise your map, click “Confirm”. You can now drill into property and community
data along this alignment.
data along this alignment.
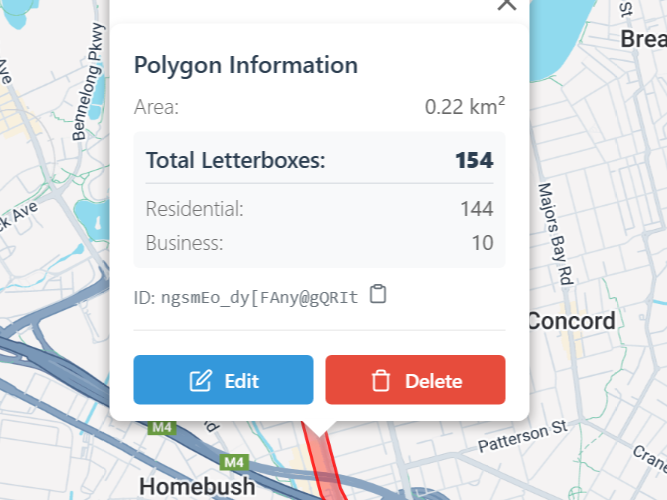
6. Optional: edit or delete your map
You can delete or edit the size of the map with a right click.